 Image: Cineberg / iStock
One of the biggest improvements the Creators Update recently brought to Windows 10 was enhanced support for Precision Touchpads, the built-in mousepads on select laptops that support multi-touch gestures. As many a Mac user knows, the ability to use one-, two-, and three-finger gestures to navigate apps, switch desktops, and perform various clicks and selections can really speed up your workflow. Here’s how to configure these settings on your Windows 10 device.
Open touchpad settings
From the Start menu, go to Settings > Devices > Touchpad to access your touchpad options. You should see “Your PC has a precision touchpad” at the top of this page. (If you don’t, your device doesn’t support a precision touchpad and you won’t see any of the associated options.)
 PCWorld
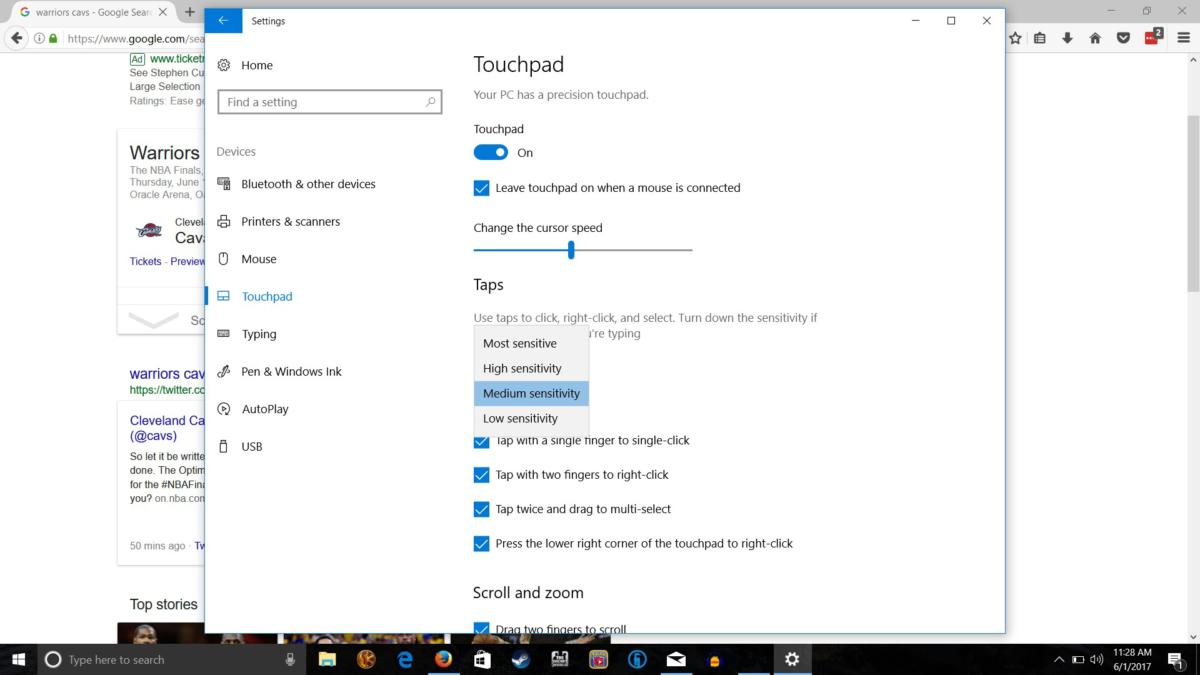
You can calibrate the sensitivity of your precision touchpad with four preset options.
You’ll also see a toggle button for activating/deactivating the precision touchpad. If you’d rather it deactivate automatically when you connect an external mouse, uncheck the box next to Leave on when a mouse is connected.
Tweak your “taps”
Next, scroll down to the Taps section, where you can configure how to use finger taps for selecting and clicking. You’ll first see a drop-down menu for setting your precision touchpad’s sensitivity. There are four options: low sensitivity, medium sensitivity, high sensitivity, and most sensitive. It’s best to leave it set to “medium sensitivity” to begin with, then adjust up or down once you get a feel for how it responds.
Beneath the sensitivity setting are four preset tap gestures for clicking and selecting. They’re all activated by default, so uncheck any you don’t want to use:
• Tap with a single finger to single-click
• Tap with two fingers to right-click
• Tap twice and drag to multi-select
• Press the lower right corner of the touchpad to right-click
Set scroll and zoom options
Under the Taps section, you have a couple of customization options for scrolling and zooming. You’ll probably want to leave the Drag two fingers to scroll and Pinch to zoom options checked. In the Scrolling direction drop-down menu, you can choose to have a downward swipe scroll the screen up or down.
Configure multi-finger gestures
The Creators Update adds an additional slate of settings: three- and four-finger gestures and taps. These will have the biggest productivity impact by increasing the speed with which you can accomplish common and repetitive tasks when you’re working.
 PCWorld
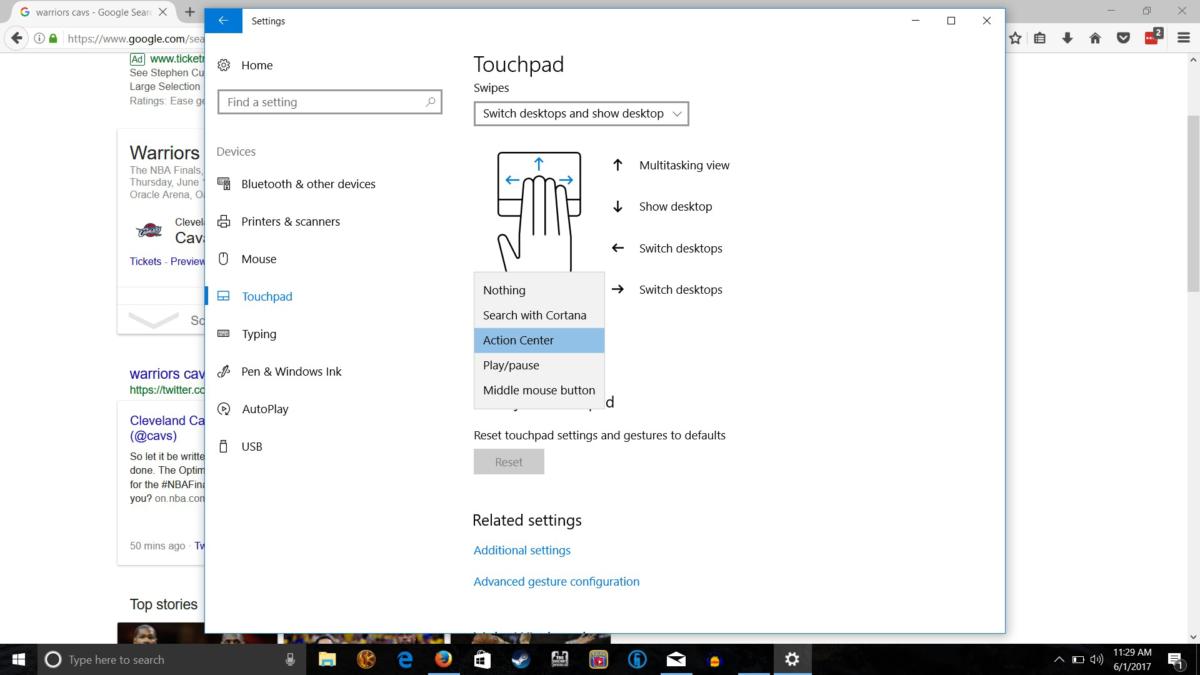
Three- and four-finger gestures can be set to perform common tasks like switching apps or desktops.
To configure three-finger gestures, click the Swipes drop-down menu. You’ll see four options:
• Nothing: This disables three-finger gestures altogether.
• Switch apps and show desktop: With this option enabled, a three-finger swipe up will open Task View, down will show you your desktop and all your open apps, and left and right will switch among running apps.
• Switch desktop and show desktop: Three-finger swipes up and down will do the same as above, but swipes left or right will switch between virtual desktops.
• Change audio and volume: With this option, you can swipe up to increase the system volume, down to decrease it, and swipe left and right to jump to the previous or next song using iTunes or another music app.
Three-finger taps can be customized to open Cortana search or the Action Center, operate as a play/pause button, or function as a middle mouse button. You can also disable multi-finger taps.
 PCWorld
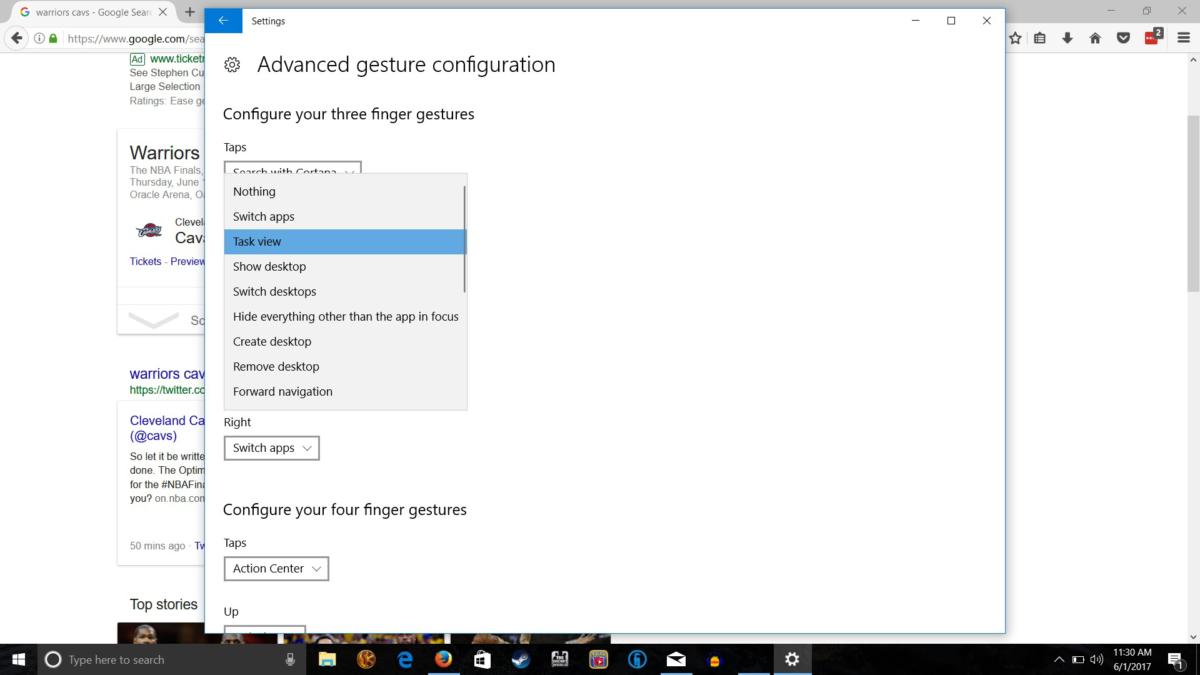
You can assign multi-finger gestures to a variety of actions in the advanced configuration settings.
Directly beneath the three-fingers section are the settings for configuring four-finger gestures. They follow the same guidelines as above.
Dive into advanced gestures
Just configuring and learning these preset options should lead to a big productivity boost. But if you’re feeling bold, you can venture into creating your own multi-finger gestures. Click “Advanced gesture configuration” under “Related settings.” This opens a new screen where you can specify actions ranging from maximizing/minimizing window to performing custom shortcuts for your multi-finger taps and swipes.


