 Image: Michael Homnick/IDG
Downgrading Windows 10 to Windows 7 or Windows 8.1 isn’t as easy as it used to be.
When Windows 10 launched in summer 2015, Microsoft offered the operating system as a free upgrade for existing Windows 7 and Windows 8.1 users. If you didn’t like what you found, you could easily roll back to your previous operating system within a 30-day window, and we showed you how to do it in this article. But that grace period passed months ago, even for stragglers who upgraded on the last day of Microsoft’s promotion. Now we’ve updated the story to tell you what options remain to you.
These days, downgrading from Windows 10 to Windows 7 or Windows 8.1 requires you to fully reinstall the older operating system or restore a system backup image you’ve stashed somewhere if you’re a home user. (Business licenses and downgrade rights are a much more complicated ball of yarn and won’t be covered in this article.)
Important: Back up your data before you go through this process! PCWorld’s guide to the best Windows backup software can walk you through your options.
 Michael King/IDG
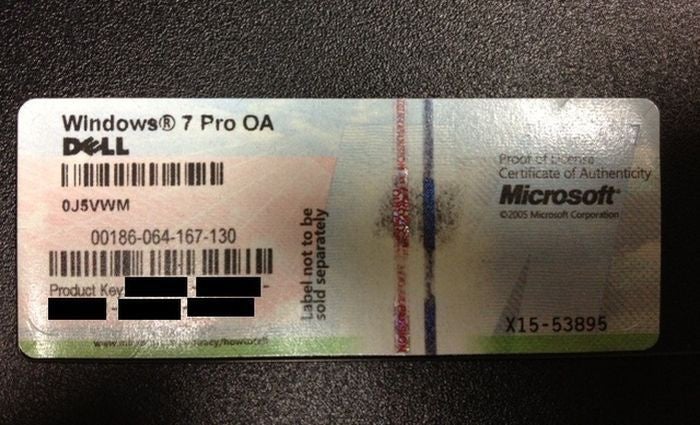
Prebuilt PCs and laptops should include a sticker that includes your Windows 7 or Windows 8 product key.
You’ll need two things to clean-install Windows 7 or Windows 8.1: the appropriate installation media for the version of Windows you’re trying to return to, and a valid product key for that version of Windows.
Snagging the operating system itself is easy. Simply head to Microsoft’s Windows software download page, where you’re able to creation installation media for Windows 7, Windows 8.1, or Windows 10. Make sure the version you download is an exact match for the version your product key is approved for—a Windows 7 Home license won’t activate on Windows 7 Professional, for instance. If you purchased a laptop or prebuilt desktop, it may have come with a restore disc in the box.
You’ll also need a valid product key to activate Windows 7 or Windows 8.1 after installing it. Your Windows 10 product key won’t do the trick.
Hopefully you jotted your original product key down somewhere before upgrading to Windows 10. Alternatively, laptops and prebuilt PCs should have a “certificate of authenticity” sticker on them (or included in the original packaging) that show your original product key information. If you bought Windows 7 or Windows 8.1 directly for installation on a DIY PC, the box that Windows came in should include a card or label with your product key on it.
 Brad Chacos/IDG
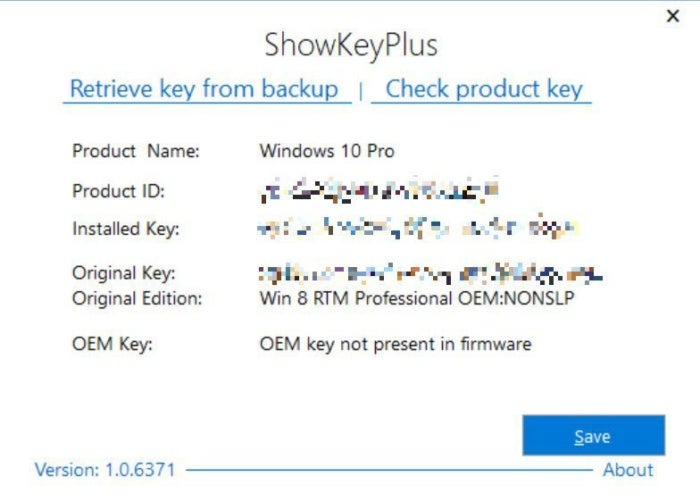
ShowKeyPlus can reveal your original Windows 7 or Windows 8 product key even if you’ve upgraded to Windows 10.
If you don’t have any of that, download and install a program called ShowKeyPlus (here’s the download link if you need it). ShowKeyPlus—which is maintained on GitHub—will reveal detailed product key and license information for your PC, including the crucial “original key” and Windows edition installed before you upgraded to Windows 10. You can use that original product key to activate Windows 7 or Windows 8.1 on your PC after reinstalling the older operating system.
Once you’ve clean-installed Windows 7 or Windows 8.1 and activated your product key, simply walk through the Windows installation process, and you’re good to go. You might have to download compatible device drivers for your hardware if your PC no longer has the older files hanging around.
This article was originally published by Ian Paul August 6, 2015.


