
 Image: Chris Hoffman
Ubuntu’s included NetworkManager software aims to make your network connections “just work.” Nevertheless, sometimes thing go awry. There are times you have to adjust or change your connection settings, especially when using a laptop—just like in Windows.
Luckily, you won’t have to pull up the terminal and type any arcane commands to make your Internet connection work.
Check the basics first
Before you blame Ubuntu, try connecting to the Internet on other devices. If they’re experiencing the same problem, it isn’t with Ubuntu—it’s with something else. For example, you may need to reboot your router, modem, or both. It’s always worth checking these fundamentals before delving into further troubleshooting.
Some laptops have hardware switches that can be toggled to quickly enable or disable Wi-Fi. If your Wi-Fi doesn’t seem to be working at all, check your laptop’s hardware Wi-Fi switch.
If you’re using a wired connection, ensure the ethernet cable is plugged firmly into both the computer’s ethernet port and the router’s ethernet port. Sure, this may seem a bit obvious, but it’s easy to miss a bumped switch or loose cable.
To fix signal strength problems with Wi-Fi networks, arrange your router, computer, and other objects in your house for the best possible Wi-Fi signal strength.
Configure your connection settings in NetworkManager
NetworkManager connects to Wi-Fi networks and automatically configures wired network connections when you plug in an ethernet cable. Before NetworkManager, you’d have to do this with terminal commands.

The popup menu for NetworkManager appears when you click on the connection icon (either wired or wireless) in Ubuntu’s notification area.
If something isn’t working properly, you may still have to configure NetworkManager. Click the network connection or Wi-Fi icon on the panel at the top-right corner of your screen to access the NetworkManager menu, then choose a network. If you need to view information about your connection for troubleshooting purposes—your computer’s IP address, for example—click Connection Information.
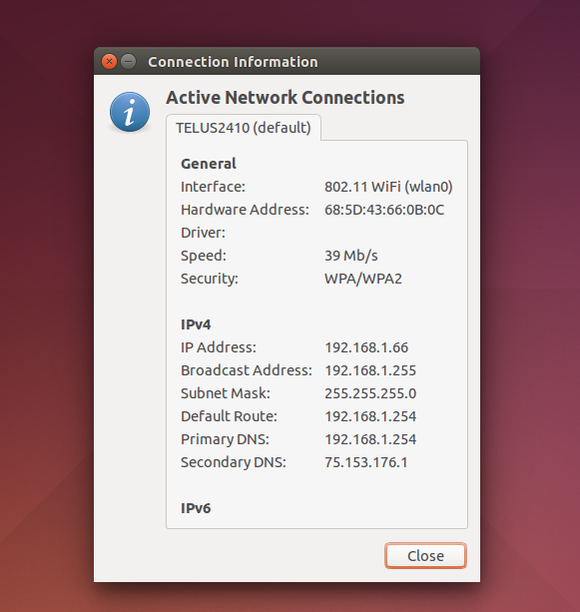
NetworkManager’s Connection Information windows shows all the details about your active connections, including network interface, security, and connection speed as well as your MAC and IP addresses.
If your local network connection isn’t working, ensure the Enable Networking and Enable Wi-Fi options are selected here in the menu. These options let you quickly disable and enable your connections, which is useful for putting your laptop into airplane mode. If you accidentally disabled either, you won’t have an Internet connection until you re-enable them.
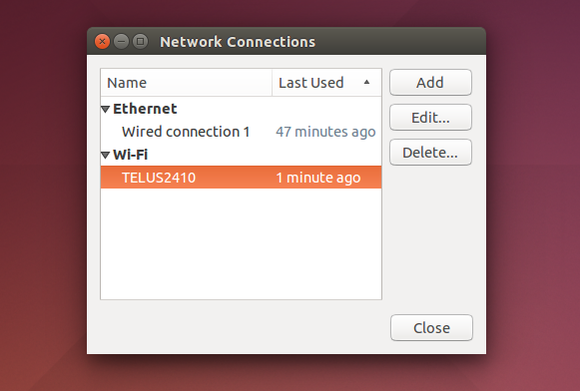
NetworkManager allows you manage several network connections and use different settings for each.
Configure your connections by clicking Edit Connections. You’ll see a window with one or more connections, depending on how many network adapters you have in your computer. Select a connection and click Edit to modify its settings.
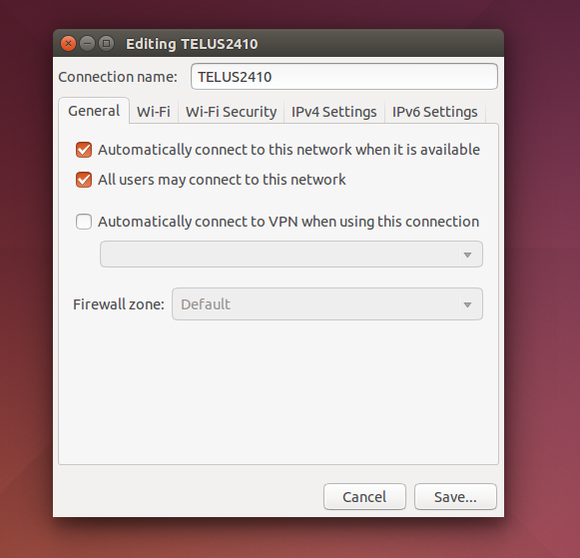
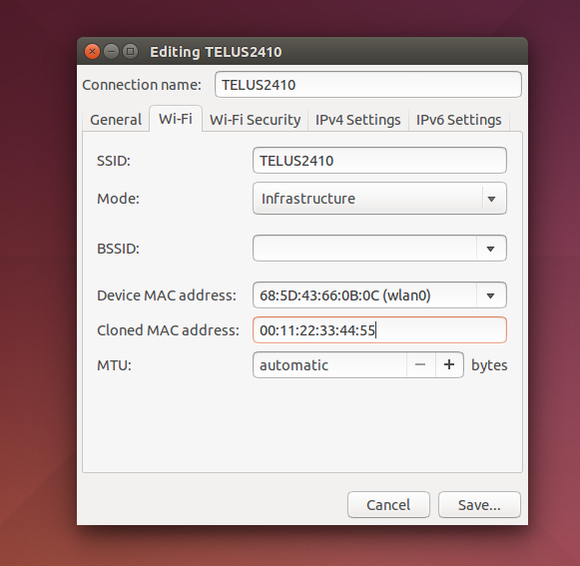
NetworkManager’s Edit Connection dialog lets you set or change all the details about your wired or WiFi connection.
Ensure the ‘Automatically connect to this network when it is available’ option is enabled on the General tab. If it’s disabled, NetworkManager won’t automatically connect to a wired or wireless network when you boot your computer.
NetworkManager uses Dynamic Host Configuration Protocol (DHCP) by default, so your computer will attempt to get connection settings—IP address, DNS servers, and default gateway—automatically from your router or Internet service provider.
For networks that require a static IP configuration, you’ll need to visit either the IPv4 Settings or the IPv6 Settings pane and select the “Manual” method. (If you’re not sure which you’re using, you’re probably still using IPv4.) Enter the details your connection requires here—your ISP or network administrator can tell you what to enter if you don’t know.
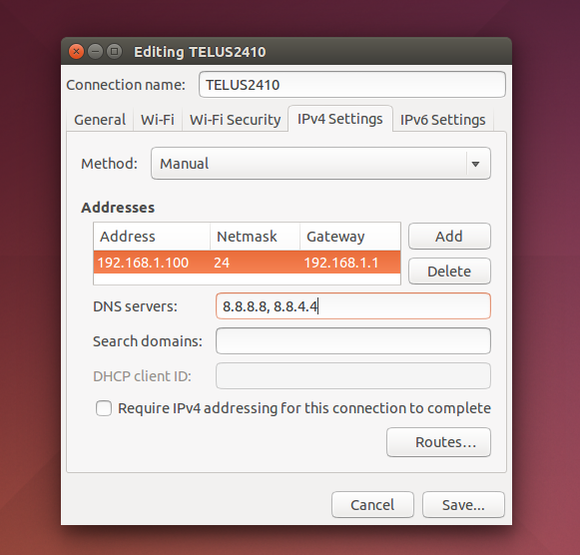
You can easily configure your connection to use manual settings and enter those settings in NetworkManager.
If, for some reason, your network only allows devices with a specific MAC address to connect, click the ethernet tab and enter that information into the ‘Cloned MAC address’ box.
Keep reading for more on checking Wi-Fi drivers and wielding diagnostic tools.
Skip the NetworkManager alternatives
You may be tempted to blame network problems on NetworkManager itself and seek alternative connection tools like Wicd. Wicd was reasonably popular a few years ago, but it hasn’t seen an update since April, 2012. If you’ve gone out of your way to install Wicd or another tool and are experiencing problems with it, you may want to uninstall it and re-enable NetworkManager.
Hardcore Linux geeks may want to ditch NetworkManager and go back to the old-fashioned way of configuring network connections by hand. But even a hardcore, penguin-loving Linux geek can save time with the automatic configuration NetworkManager provides.
Make sure you’re using the right Wi-Fi drivers
Ubuntu and other Linux distributions include a variety of open-source drivers that support most Wi-Fi and wired ethernet hardware built into laptops and desktop PCs. You shouldn’t have to install any drivers in most cases. After installing Ubuntu or even booting up an Ubuntu live CD or USB drive, your hardware should be detected automatically.
Some wireless network hardware still requires a proprietary, closed-source driver provided by its manufacturer, or a special firmware file you’ll have to install. You can check to see if your hardware is supported by the Linux kernel before looking for proprietary drivers. Ubuntu tries to make this easy by providing a driver installation tool that will quickly install and enable these third-party drivers.
If Wi-Fi isn’t working in Ubuntu, click the gear icon at the top-right corner of the desktop, select System Settings, click the Software & Updates icon, and click the Additional Drivers tab.
Ubuntu will scan your system’s hardware and show any alternate drivers you can use. Many of these files come on Ubuntu’s installation media, so they can be installed even if you don’t have an Internet connection.
If that doesn’t work, perform a web search for your computer’s name and model number or your Wi-Fi hardware’s name and “Wi-Fi Ubuntu,” or something similar. You can often find fixes for specific hardware in forums.
USB modems and Wi-Fi dongles can be harder to set up. You may have to search for your specific USB device and see if there are any tweaks or drivers available.
If your computer has both wired ethernet and Wi-Fi, plug an ethernet cable into your computer so you can download any specific drivers you may need. The wired ethernet connection is much more likely to work with the built-in drivers.
Diagnose the problem
Ubuntu includes many standard network troubleshooting tools you can access from the command line, like ping and traceroute. These tools are very useful on Windows, too, where they must be run from a Command Prompt window.
The ping command is probably the most useful. Open a terminal, type the following command, and press Enter:
ping -c 5 google.com
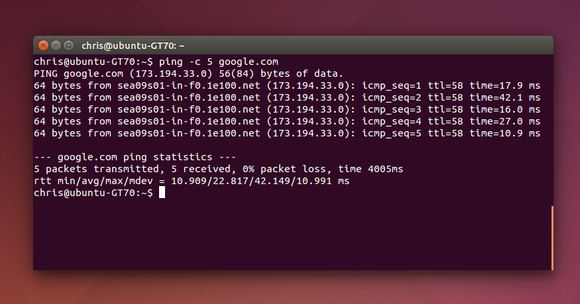
The tried and true console diagnostic for connectivity is the ping command.
This command will send five ICMP echo request packets to google.com. You should see five responses. If you see zero responses, your computer can’t reach google.com—this means Google.com is down or, more likely, your Internet connection isn’t working at all. If you get fewer than five responses, you know that you’re experiencing “packet loss,” which can indicate there’s a problem with Google, your router, your modem, or your Internet service provider.
The ping command can help you see what the problem is—whether you have no Internet connection at all, packet loss, or just extreme latency. Ping is also essential for diagnosing Internet connection problems in Windows.
If you’re new to Ubuntu, don’t want to mess with terminal commands and can get online at another location, you may want to skip the terminal and use a graphical tool instead. Ubuntu used to include this tool, but now you have to install it from the Ubuntu Software Center.
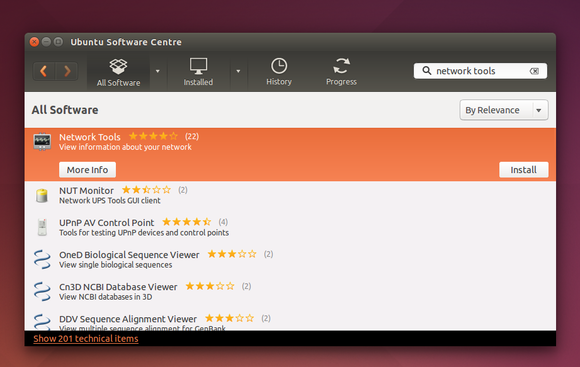
Use Ubuntu’s Software Center to look for Network Tools.
Open the Ubuntu Software Center, search for “Network Tools,” install the Network Tools application, and launch it. The program provides a graphical interface for ping, traceroute, and other network diagnostic commands.
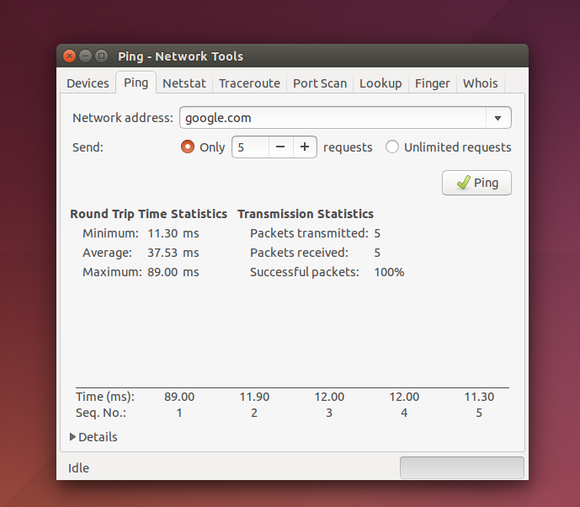
Network Tools offers a GUI for common console network diagnostic tools like ping and traceroute.
Maybe it’s someone else’s fault
Remember, you can’t always solve every Internet connection problem on your own. The problem may be with a remote website, a switch somewhere in the route between you and that website, or your Internet service provider. Ask your neighbors if they’re having problems, or you check with your ISP.


