 Image: Foundry
What you should back up depends on how you use your PC. As a rule, a regular backup of the home directories is sufficient. This protects against data loss—for example, if an important file is accidentally deleted. With a suitable tool, you can automate the process.
If many programs and perhaps server services are installed, a complete backup of the hard disk is recommended from time to time. We present tools with which an image of the drive can be created and, if necessary, also restored on a new hard disk.
Duplicati: Data backup (also in the network)
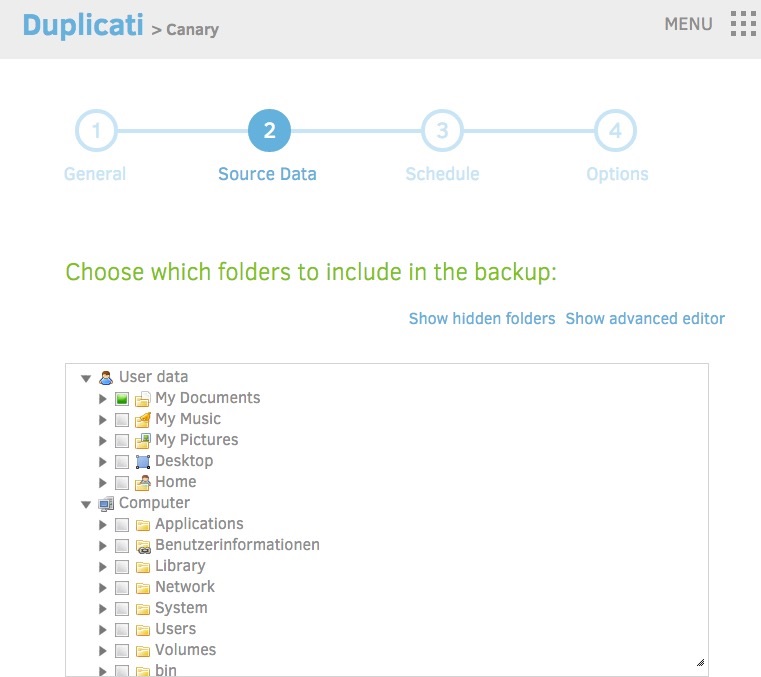
Duplicati is suitable for regular backups of personal files. The tool supports backups on local drives, via FTP and SFTP as well as Google Drive, Dropbox, Microsoft OneDrive, and some others. Continuous backups are incremental. Duplicati therefore only saves the changes from the previous backup.

Duplicati
Duplicati
Duplicati
At duplicati.com/download, users of Ubuntu or Linux Mint will find a DEB package that can be installed via the distribution’s package manager. In the terminal, use this command line in the download directory:
sudo apt install ./duplicati_2.0.6.3-1_all.debAdjust the file name for newer versions.
If one starts Duplicati from the desktop, it runs with the user’s rights. A scheduled backup is only performed if you are logged in and have started Duplicati. The web interface is accessed in the browser via http://localhost:8200.
For backups of folders that the standard user is not allowed to access, Duplicati must be started as a system service. Scheduled backups are then automatically executed in the background. Activate and start the service in the terminal with these two commands (Ubuntu/Linux Mint):
sudo systemctl enable duplicati
sudo systemctl start duplicati
Configure backups: Duplicati assigns the web server port automatically. The first instance that Linux has started as a system service is assigned port 8200. If Duplicati is also started manually, the interface is accessible via port 8300. If the system service is not configured, the URL http://localhost:8200 also applies here . By clicking on Add backup, you define a backup task with the help of a wizard.
Restore backup: After clicking on Restore, select the desired backup and then the elements in the file system. The files can be restored to the original location or copied to another directory. If the restore is done after a new Linux installation, select the option Direct restore from backup files.
Tip: For a backup of your own home directory — for example, to a USB hard disk — the following command line is sufficient:
rsync -avP $HOME /media/$USER/[Laufwerks-ID]/backup“[drive ID]” is the designation of a hard disk that Linux has mounted under “/media/$USER”. Change the path according to your system configuration.
Further reading: How to get started with Linux: A beginner’s guide
Timeshift: Incremental system backup
Timeshift creates snapshots of the file system. When restoring, the previous state can be restored. A second hard disk should be used as the target drive so that the backup is preserved in the event of a failure of the system hard disk.
Timeshift is pre-installed in Linux Mint; Ubuntu users use these three commands in the terminal:
sudo add-apt-repository -y ppa:teejee2008/ppa
sudo apt update
sudo apt install timeshift
After the first start, select the option rsync as snapshot type and specify the target drive and a schedule. The home directories are excluded from Timeshift by default because otherwise personal data will be overwritten during a restore. It’s better to back up your own files with Duplicati. Files and folders can be copied from the Timeshift backup by clicking on Browse in the file manager. Restore resets the system to the selected restore point.
Aptik: Backup before new installations

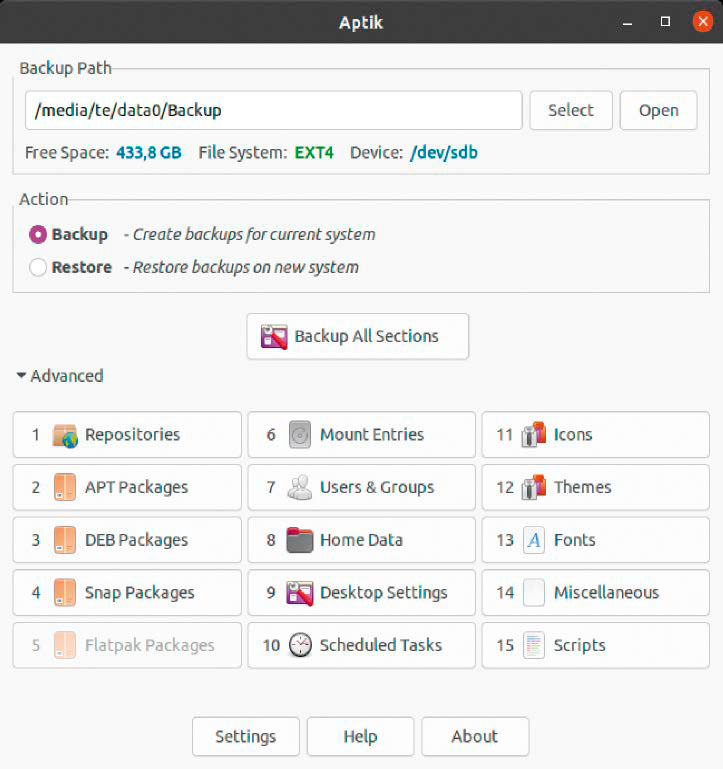
Save settings with Aptik: The tool saves personal files as well as the apt configuration and a list of self-installed packages.
Save settings with Aptik: The tool saves personal files as well as the apt configuration and a list of self-installed packages.
IDG
Save settings with Aptik: The tool saves personal files as well as the apt configuration and a list of self-installed packages.
IDG
IDG
If you have installed a lot of software, you can reduce the effort after a new Linux installation or when setting up a second computer. With a list of the installed packages and a backup of the repositories used, the previous state can be restored quickly. If available, snap and flatpack packages should not be forgotten. Other backup candidates are fonts, desktop themes, icons, and self-created entries in the file “/etc/fstab”.
Aptik can be used to back up all of the above and much more. However, it is available for a fee ($25). An older free version for the command line can be downloaded from https://github.com/teejee2008/aptik. But it’s not guaranteed to work properly under current distributions.
Tip: If a list of manually installed packages is sufficient, you can use this command line in the terminal (Ubuntu/Linux Mint):
comm -23 <(apt-mark showmanual | sort -u) <(gzip -dc /var/log/installer/initial-status.gz | sed -n 's/^Package: //p' | sort -u) > pkglist.txtAfter the new installation, this command is sufficient:
sudo apt-get install $(cat pkglist.txt)This restores the packages from the previously saved list.
Rescuezilla: Backing up the hard disk

Rescuezilla
Rescuezilla
Rescuezilla
A 1:1 copy of the hard disk contents is the safest backup method. However, the process is time-consuming for well-filled drives, and changes that occur between backups must be backed up separately. However, for PCs that serve as file servers and on which little changes — except for updates — an image copy of the hard disk can be useful.
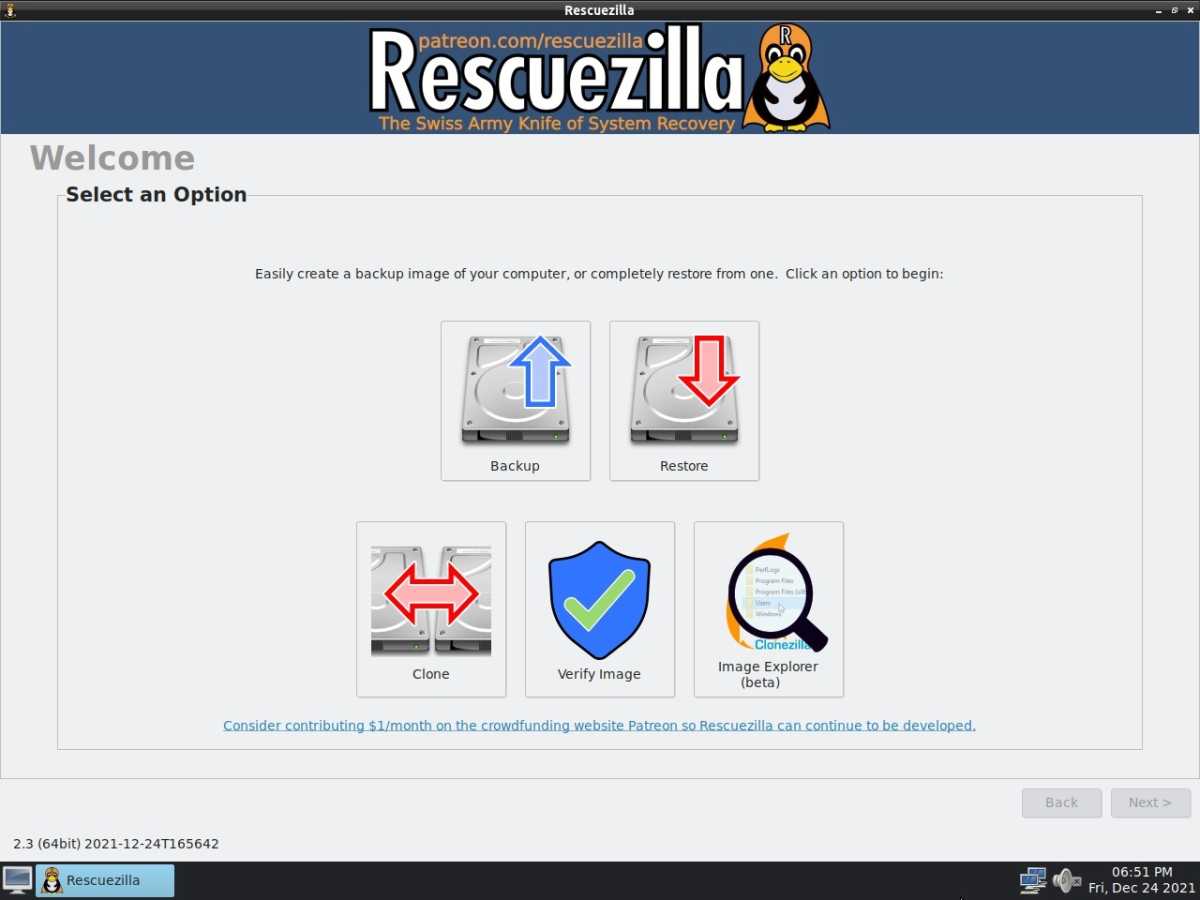
Rescuezilla creates image backups of partitions and entire drives. The backup can be saved on a USB hard drive or a network drive. You can burn a DVD from the downloaded ISO file or create a bootable USB stick, for example with Etcher.
After clicking on Save, enter the source drive, partitions, and destination drive. Under Compression method, select Uncompressed. You can then extract individual files or folders from the image using the Image Explorer offered by Rescuezilla. After clicking on Restore, the saved image can be copied back to a hard drive.
Rescuezilla uses Clonezilla in the background. Professionals can start Clonezilla directly in the terminal and use the additional options of this program.
This article was translated from German to English and originally appeared on pcwelt.de.
Author: Thorsten Eggeling

Thorsten Eggeling schreibt seit gut 20 Jahren Artikel für die PC-WELT.
Recent stories by Thorsten Eggeling:
The best Linux software for Windows switchers


