
 Image: IDG / Alex Huebner
If you spend hours a day staring at a computer screen, there’s a high possibility you may suffer from tension headaches and eye strain. While there are a few solutions available for purchase like blue-blocking glasses or screen films, Windows 11 has a built-in feature to block blue light without paying for anything extra. All you have to do is just make a few simple tweaks in your settings!
How to enable the Night Light setting in Windows 11
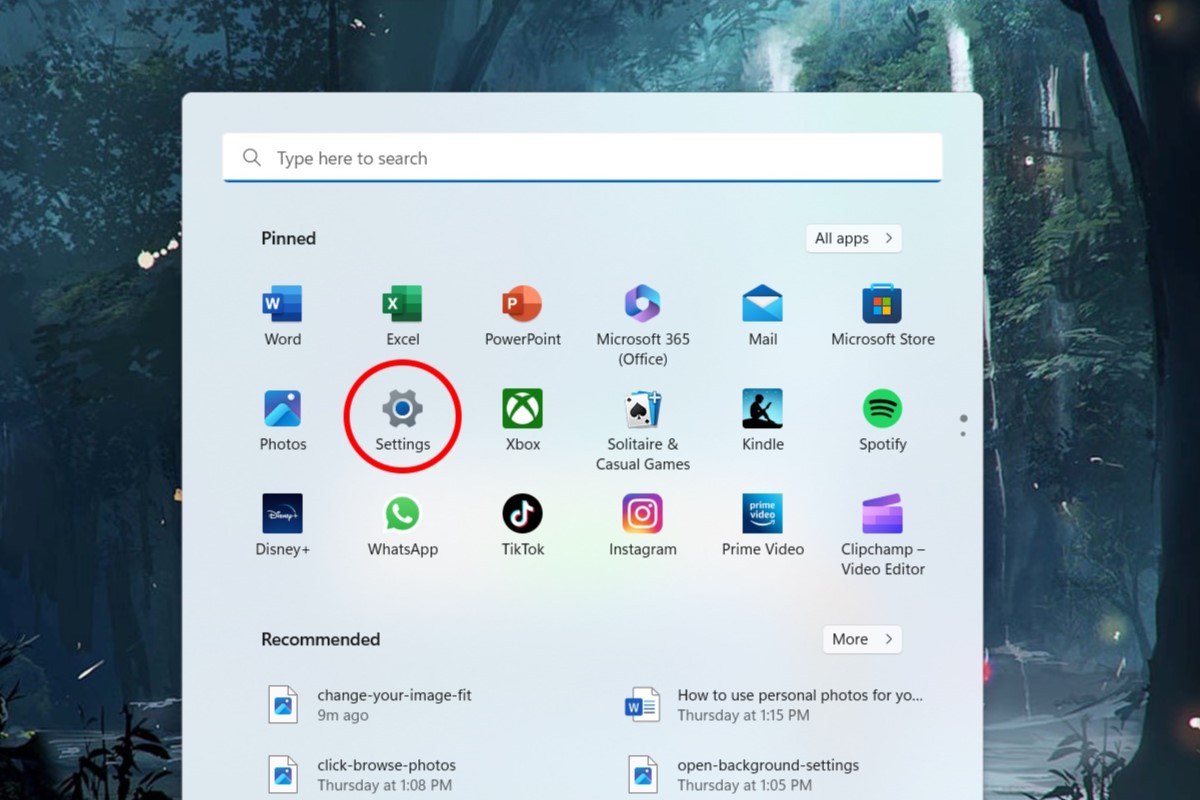
To get to your settings, click the Windows icon on your taskbar and select the gear icon labeled Settings.
IDG / Alex Huebner
IDG / Alex Huebner
IDG / Alex Huebner
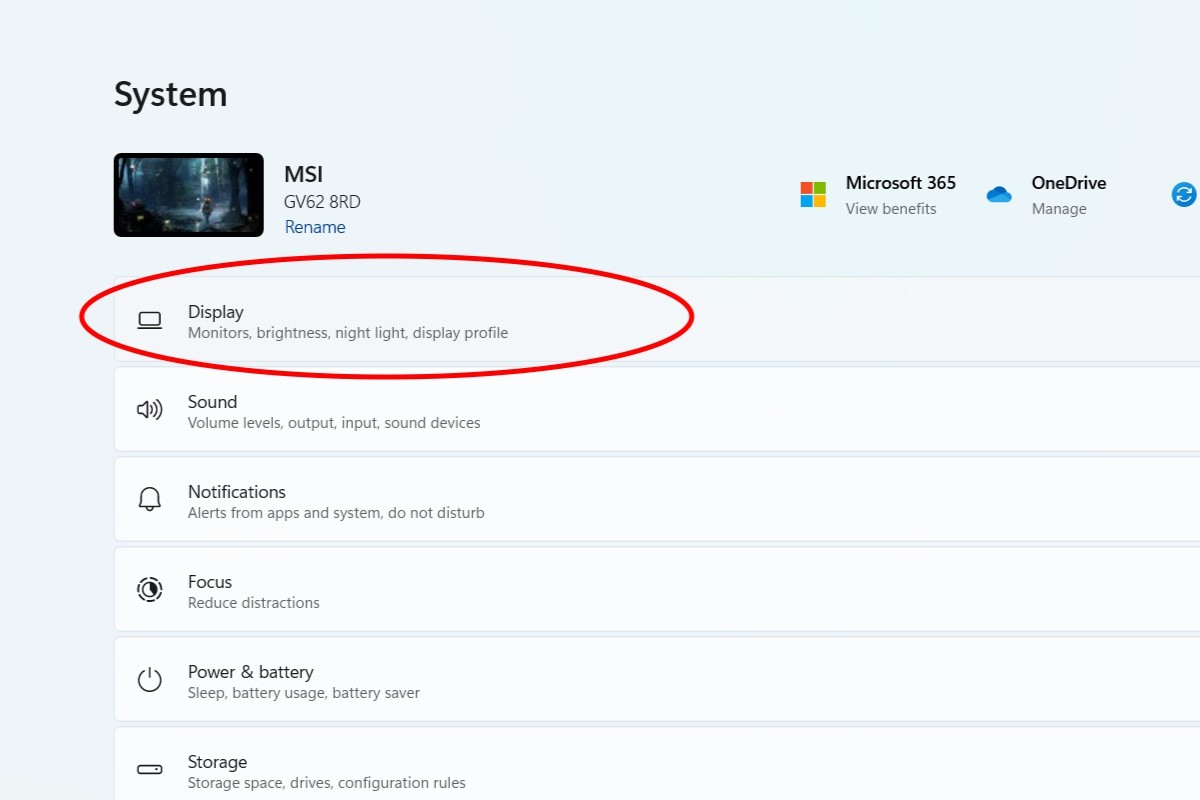
This will open your system settings menu. To access the Night Light settings, select Display.
IDG / Alex Huebner
IDG / Alex Huebner
IDG / Alex Huebner
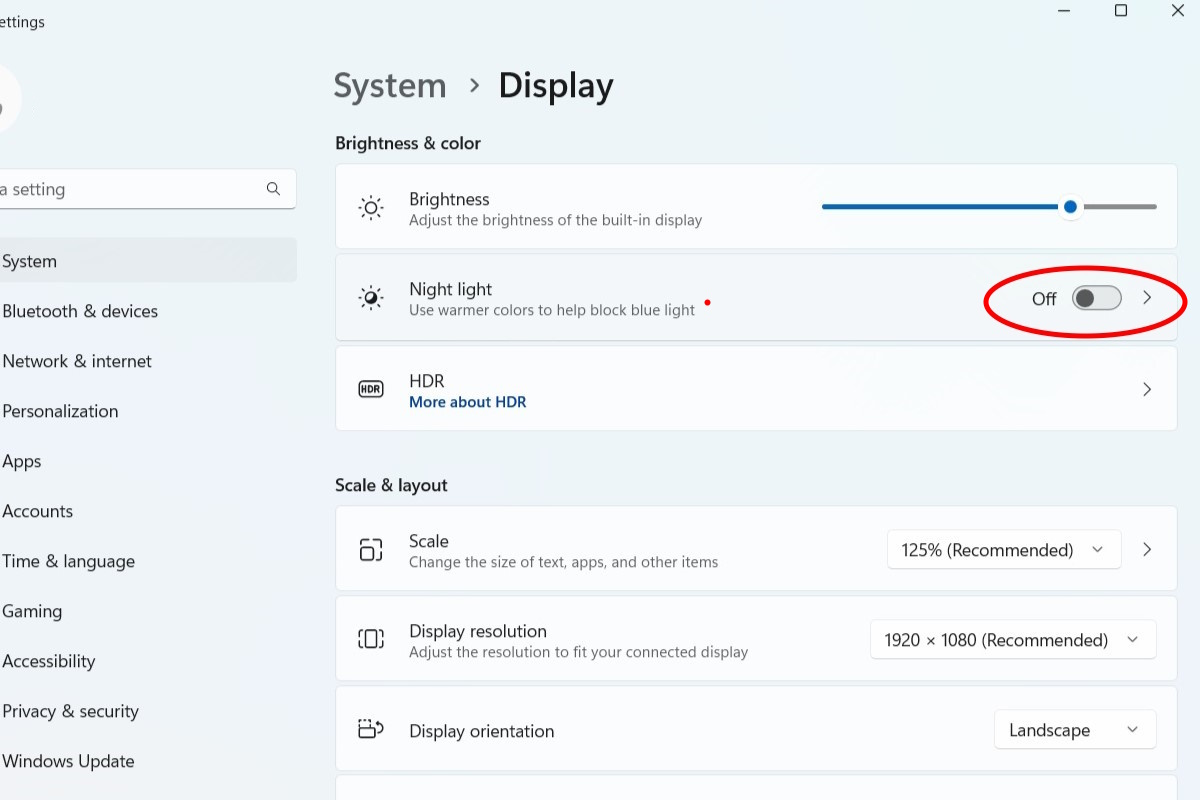
If you’d like to block the blue light all the time, click the slider to switch the Night Light setting to on.
IDG / Alex Huebner
IDG / Alex Huebner
IDG / Alex Huebner
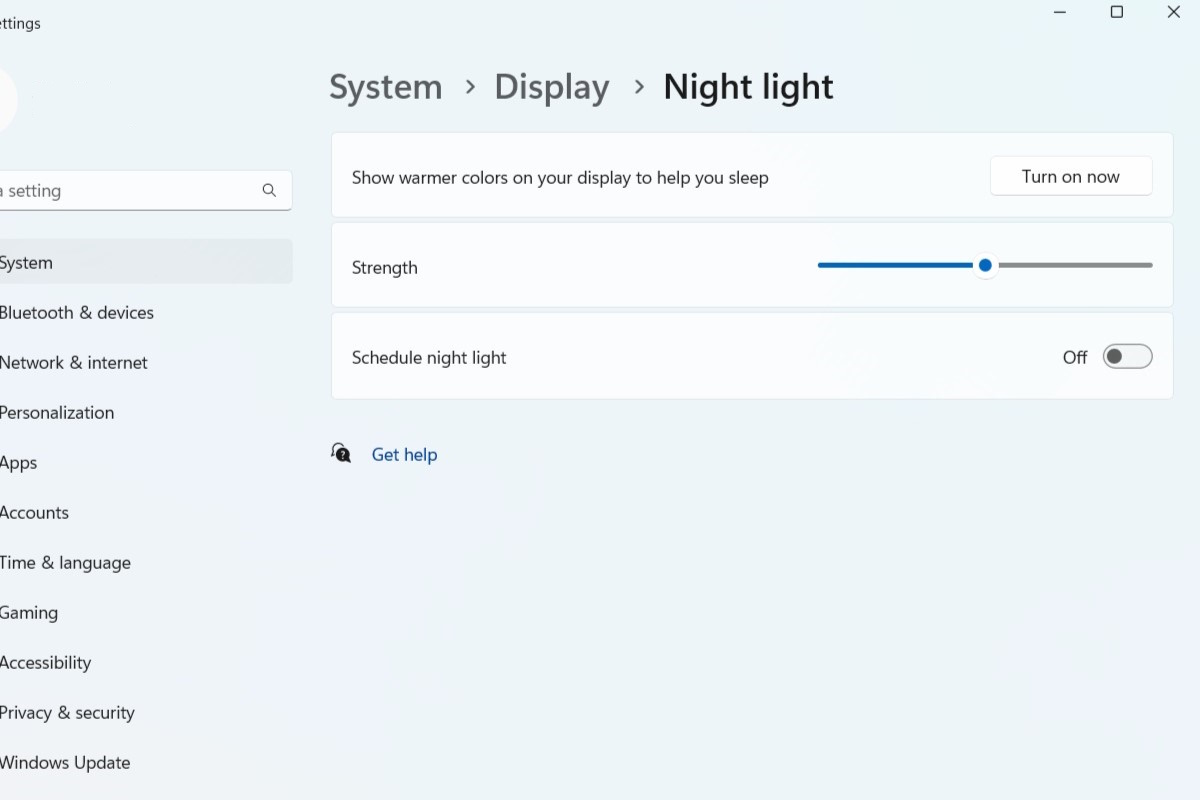
Click the arrow to change the strength of the blocker or set it on a schedule.
IDG / Alex Huebner
IDG / Alex Huebner
IDG / Alex Huebner
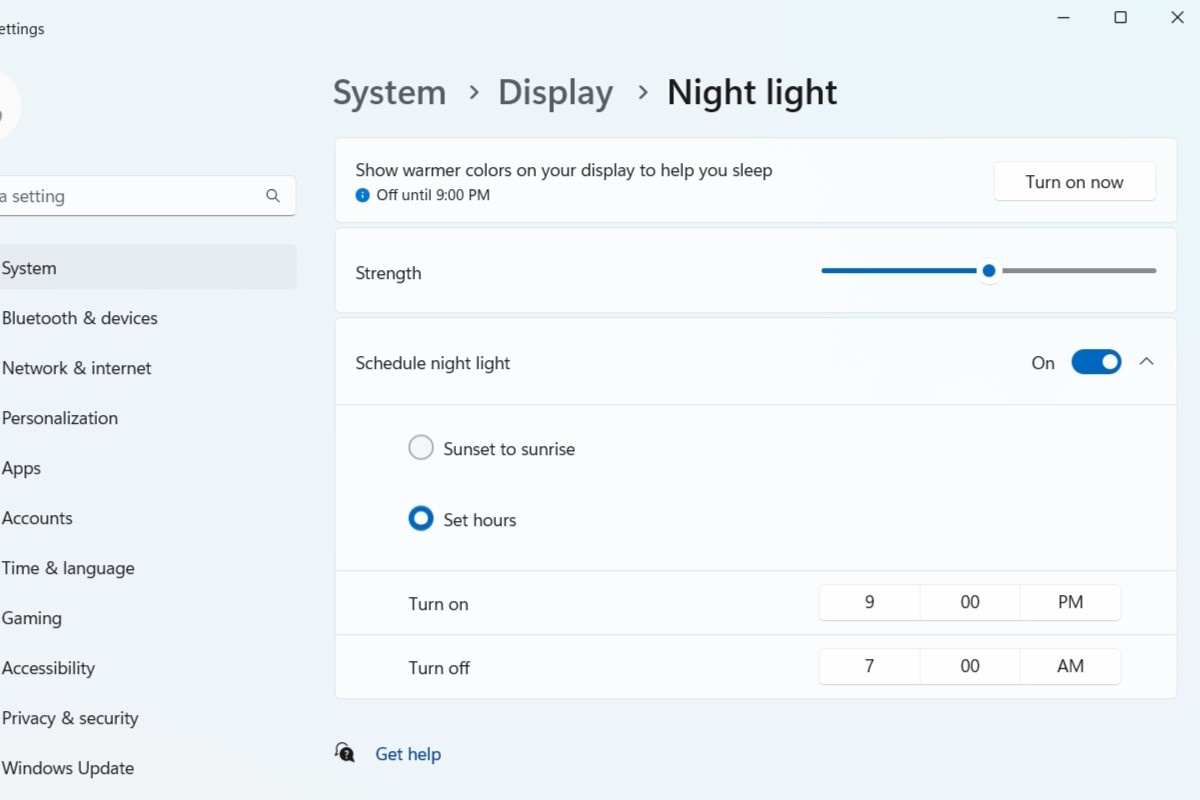
When you select the slider next to Schedule night light, you can choose to set custom hours by pushing the set hours bubble. Just click the numbers and AM or PM to change the times.
IDG / Alex Huebner
IDG / Alex Huebner
IDG / Alex Huebner
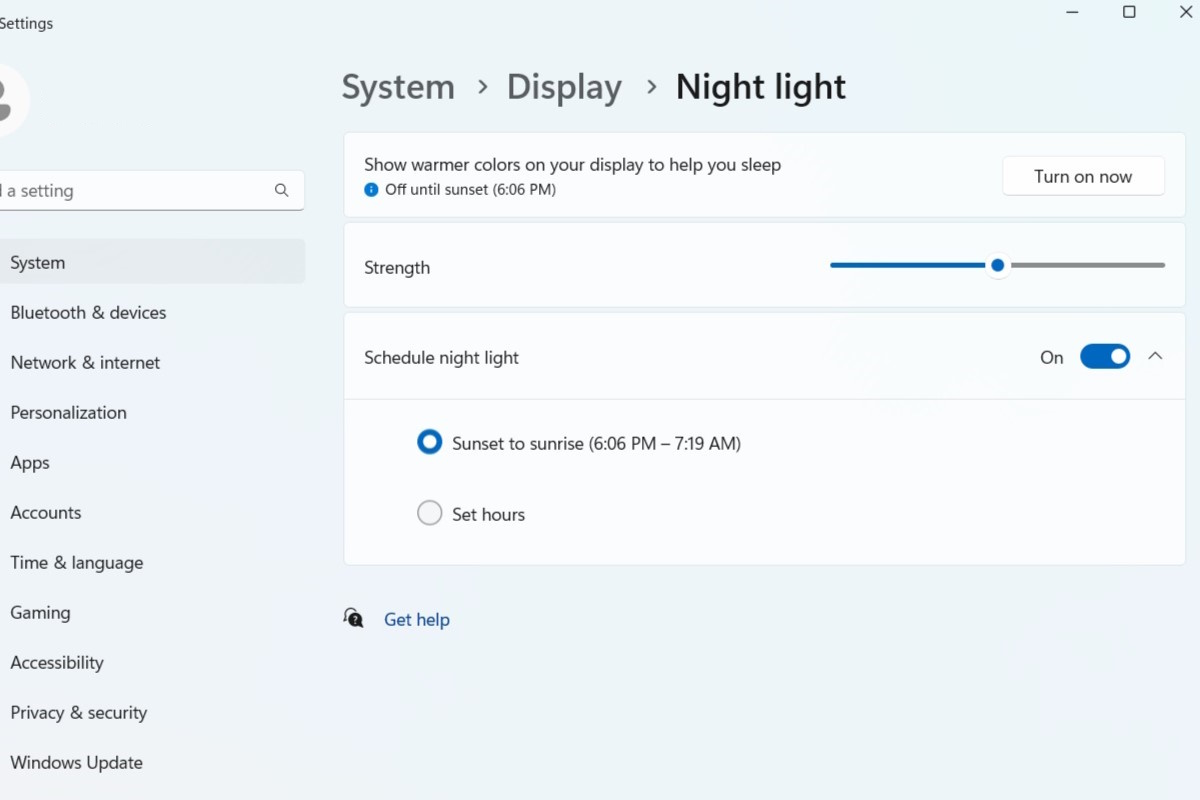
Selecting the bubble next to the Sunset to sunrise option will use your location to determine specific sunset and sunrise times to keep your night light active during evening hours.
IDG / Alex Huebner
IDG / Alex Huebner
IDG / Alex Huebner
It’s that easy! Any time you want to shut off the night light, just return to the display settings and switch the Night Light slider to off.


