 Image: Valve
In early 2016, I rid the Windows 10 Start menu of Live Tiles on my PC. Live tiles just weren’t that useful to me, or at least I didn’t see a reason to keep them. But now I’m starting to bring live tiles back after finding a useful—or at least novel—reason for them: Steam games.
 Ian Paul
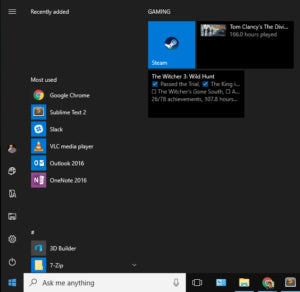
Steam games as live tiles in the Windows 10 Start menu.
An odd quirk of Steam is that you can’t easily add live tiles for your games to the Start menu or Start screen. But a free Windows Store app called Steam Tile can solve that problem in Windows 8 and Windows 10.
When you use Steam Tile you add individual tiles to Start for your Steam games with information on your progress.
Each tile will switch between displaying game art, and your personal stats—such as hours played and badges earned— pulled from Steam. The content of the live tile will vary by game. In my case, for example, Tom Clancy’s The Division only displayed hours played, while The Witcher 3: The Wild Hunt showed achievements and hours spent battling in CD Projekt Red’s open world game.
It’s a nice addition to the Start menu. The only downside is that to use Steam Tile you have to set your Steam profile to public, which may be a deal-breaker for some. It also seems like the app hasn’t been updated in a while, as the dialogs inside it all mention Windows 8. Even so, it still works just fine in Windows 10.
Adding Steam Tiles with Steam Tile
 Ian Paul
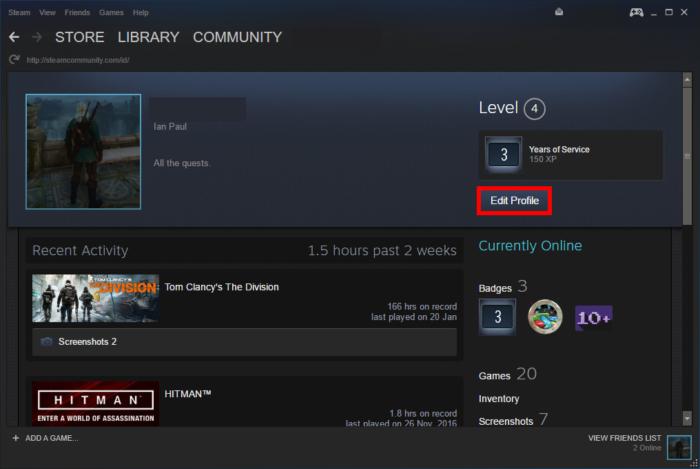
Click Edit Profile to make your profile public.
First, let’s set our Steam profile to public. Open the Steam desktop program, and then click your username in the upper right-hand corner. From the drop-down menu select View Profile. Next, select Edit Profile on the right-hand side of your profile under the Years of Service marker.
 Ian Paul
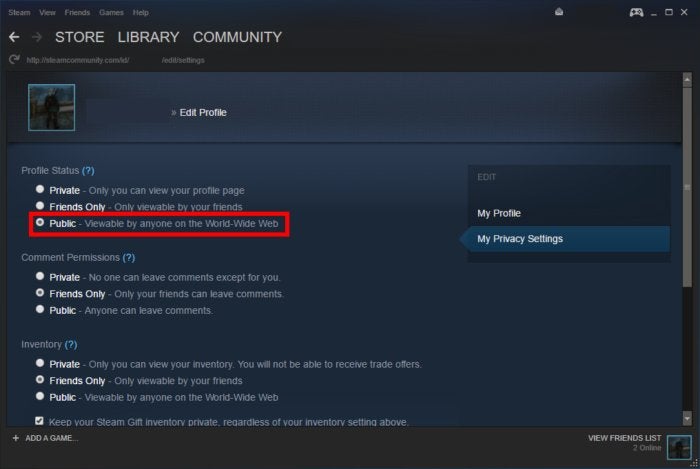
Under My Privacy Settings make your profile public.
On the next screen select My Privacy Settings on the right-hand side. Then under Profile Status select the Public radio button. Finally, scroll down to the bottom of the screen and click Save Changes. While we’re here make a note of your Steam user profile URL, which is http://steamcommunity.com/id/[your username]/. You’ll need this in a moment.
Next, download and install Steam Tile from the Windows Store (link above). Once that’s done launch the program and it will ask for your Steam profile URL. Most of the URL is already filled in all you need to add is your username and then click Update.
 Ian Paul
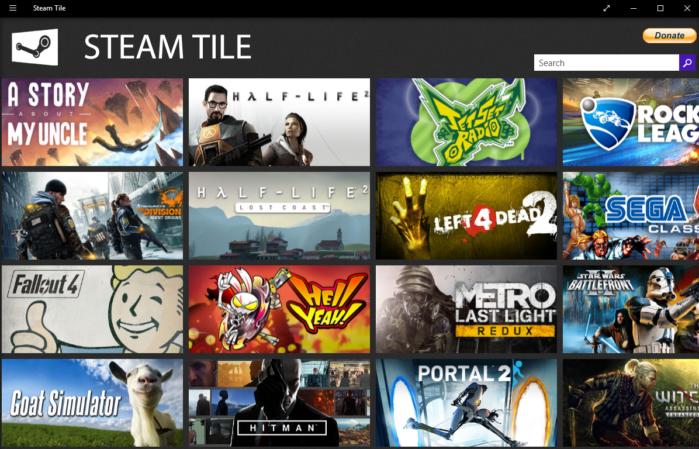
Steam Tile in action.
After a few moments, you should see a screen like the one here with a list of games in a tiled list. Either choose the game you want from the list or search for a specific game in the search box. Once you find the game you want, click it and don’t be put off by the magnify effect you see when you hover over a tile.
Next, a pop-up window will inform you that Steam Tile is trying to add a tile to your Start menu. Click Yes and after a few moments the tile should be in your Start menu.
Now here’s another downside of this scheme. If you attempt to launch your game using the new live tile it will actually launch Steam Tile, which will in turn launch Steam, which will then launch the game. It’s a little circuitous, but as soon as Steam Tile launches you can just shut it down if you don’t want it taking up precious system resources
Is this format easier than launching the games yourself using Steam directly? No. But personally I like seeing live tiles of my current games as a constant reminder that I need to, as our resident games critic Hayden Dingman would say, “bow before the grind.”


