
You may not know it, but the hottest component in your PC isn’t your CPU, it’s actually your video card.
Today’s high-performance GPUs can put out two to three times the heat of a high-end CPU. That typically translates into enough fan noise to drive you batty while gaming. (Ready for an upgrade? Check out our expert reviews on the best graphics cards to choose your next GPU.)
There’s an easy way to solve that problem though: water. OK, it’s technically “liquid,” because it’s typically an anti-freeze-like substance, but in the parlance of our times, it’s water cooling. Enthusiasts have long resorted to custom cooling setups to keep video card noise to minimum.
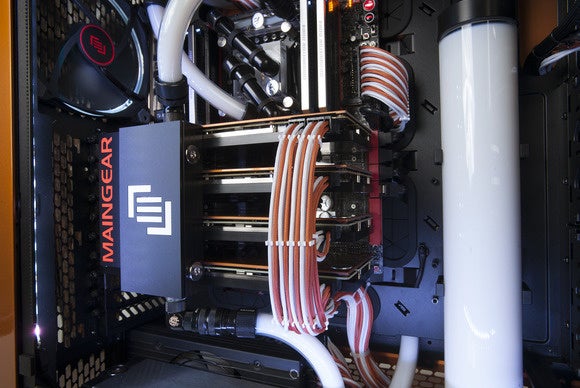 Rob Schultz
This Maingear Epic Force uses liquid cooling to keep its four GPU’s quiet and cool. That cooling system is also easily a grand in parts.
The problem with custom liquid cooling is it’s neither easy nor cheap. An EK-brand GPU water block can easily cost more than a hundred dollars—and that doesn’t include the hosing, pump, radiator or reservoir that you’ll also need. In the end, custom liquid-cooling a video card could cost as much or more than the video card itself, depending on your options.
EVGA GeForce GTX 1070 Ti FTW2
 Price When Reviewed:$499.99Best Prices Today:$699 at Amazon
You don’t have to be Mario
The good news is there’s an easier option—and it doesn’t take a Mario-level of plumbing skill, either. If you want to water-cool your two-year-old GPU because you’ve finally worked up the courage to risk destroying it, you can do it quickly and fairly cheaply.
Rather than full-on custom liquid cooling, you can use off-the-shelf, closed-loop liquid coolers for the job. For example, NZXT offers its G10 universal bracket adapter that you use with its closed loop, and Arctic offers an entire kit for cooling GPUs.
Like NZXT, Corsair offers a bracket to fits its coolers. For today’s how-to, I’ll be using Corsair’s Hydro Series HG10 A1. It’s a $35 metal bracket that you could mate with many popular Corsair coolers.
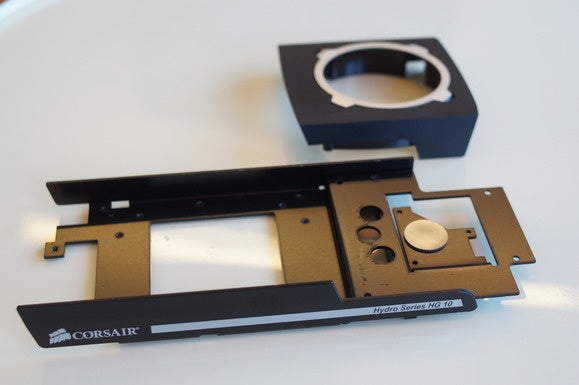 Gordon Mah Ung
The Corsair HG10 A1 is a basic metal braket with a fan shroud. You’re expected to reuse the fan from your original cooler.
Reuse
Corsair’s philosophy with the HG10 A1 bracket is apparently rooted in green. The idea is that once you’ve upgraded to a newer cooler for your CPU (Corsair brand, natch), you just reuse the old one with the HG10 A1 on your GPU. Whereas some designs try to be universal, Corsair’s HG10 A1 is actually specific to a few popular GPUs that follow the factory reference design. Highly modified GPUs from Asus, Gigabyte, MSI and the like won’t work, as they typically use custom designs.
For my GPU project, I used a reference Radeon R9 290 card. In the interest of full disclosure, I did use a dead Sapphire Radeon R9 290X as a photo and video dummy. Both cards, though, use the same layout and are pretty much physically identical.
This upgrade is quite easy and can be done in 20 minutes—if you’re comfortable building a PC. But there are risks. If you’re uncomfortable taking apart your PC, or a klutz, or can’t accept blame if you destroy it, don’t attempt this.
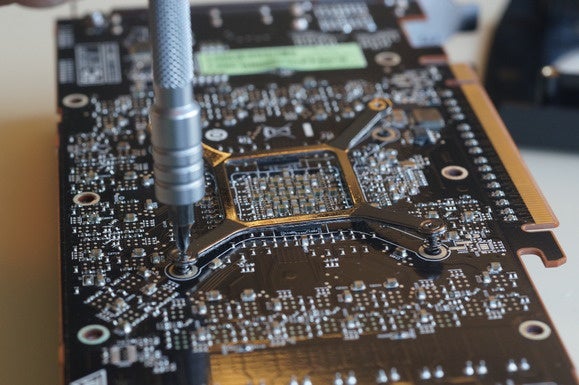 Gordon Mah Ung
To remove the stock cooler, just unscrew the screws around the perimeter and the then remove the screws from the tensioner.
To get the stock cooler off of a Radeon R9 290, remove the 12 large Phillips-head screws from the perimeter of the card. Then remove the four small screws from the tensioner. I recommend using a light-color coffee mug or cup to hold screws from your project, rather than placing them on your work surface, where they will roll away without a trace.
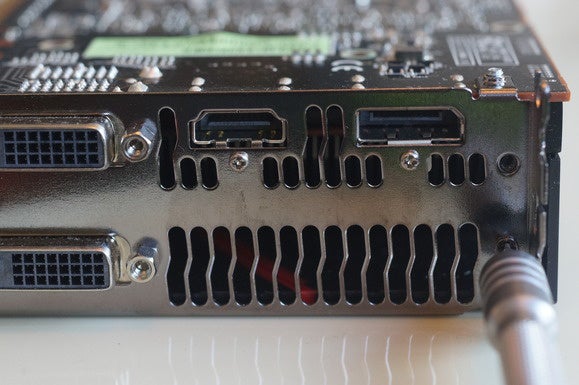 Gordon Mah Ung
To remove the stock fan shroud on a Radeon R9 290 or 290X, you’ll also need to remove two screws from the I/O part of the card.
Once all of these screws are removed, you can carefully separate the PCB from the cooler assembly, applying a little pressure to break loose the thermal paste. Don’t force it. If you can’t separate the two, check to see if you forgot a screw.
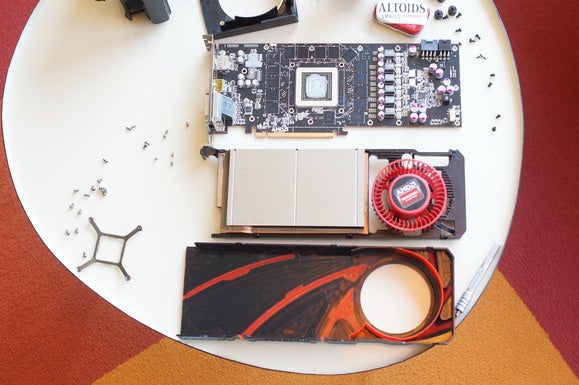 Gordon Mah Ung
Here’s what a Radeon R9 290 looks like in pieces. The Altoid tin will be used to store the screws and tiny bits.
Remove the fan shroud
Once you have the cooler assembly off the PCB, you’ll also need to remove the plastic fan shroud from the cooler assembly. You need to do this because Corsair actually wants you to reuse the stock fan. Another green touch? The fan would otherwise go into the E-waste bin right? To do this, you’ll need to remove the tiny black screws around the perimeter of the fan shroud. There should be six of them.
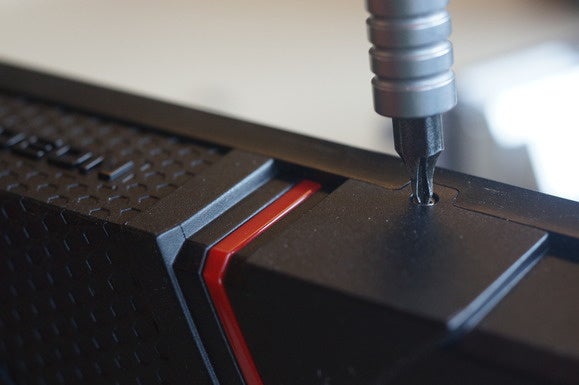 Gordon Mah Ung
You resuse the stock fan so you’ll have to remove the fan shroud.
Now separate the fan shroud from the cooler assembly by gently prying them apart. To remove the stock fan, flip over the heat sink assembly and remove the three screws that hold the fan. They’re readily visible and form a triangular shape.
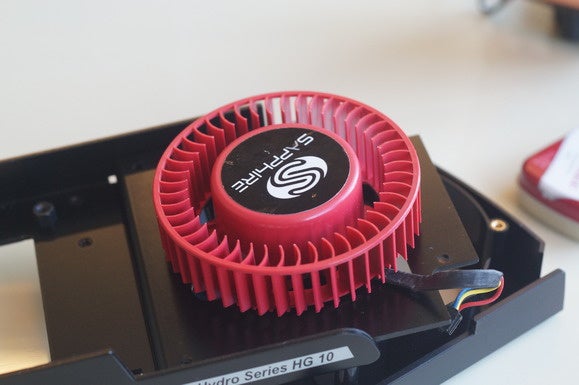 Gordon Mah Ung
A stock Radeon fan attached to the Corsair HG10 A1 cooler bracket.
Now use the same three fan screws to attach the fan to the HG10 A1 bracket. Before you do this though, route the fan wiring so it will reach the fan header connector on the video card. You’ll need to basically lay the fan on the bracket and then lay the bracket on the GPU’s PCB to confirm the correct routing.
Once you’ve attached the fan to the bracket, install the included black plastic fan shroud included with the HG10 A1. To do this, use screws that Corsair included with the kit.
One last step before you attach the bracket to the PCB is to install the four correct standoff studs to the bracket. Which studs you use will depend on which cooler you use; check the manual.
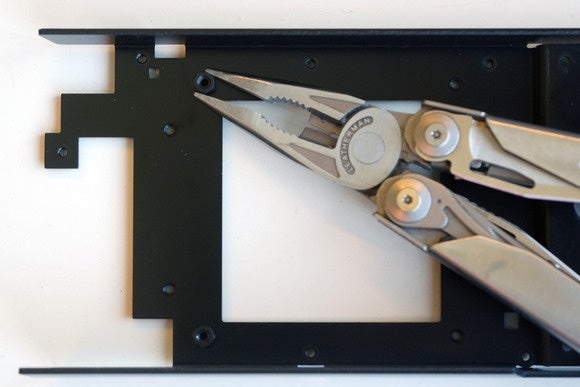 Gordon Mah Ung
Pick the correct offset studs for your cooler and install them to the bracket.
With the bracket set up, you’re ready to mount it to the PCB. You may, if you want, attach the cooler’s water block or cold plate to the bracket, but it makes for a clumsy affair. The right way to do it is to attach the HG10 A1 bracket to the PCB and then install the cold plate.
 Gordon Mah Ung
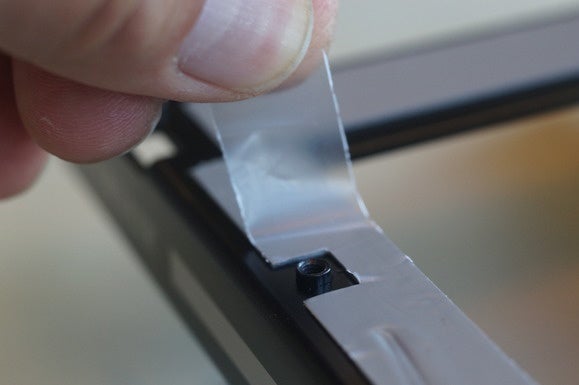
Remember to remove the plastic tape that protects the thermal pad on the bracket before attaching it.
Attach the bracket
Now you’re ready to attach the bracket to the GPU’s PCB. Before you do that, make sure to remove the protective plastic from the bracket’s thermal pads. These pads make contact with the RAM and voltage regulation modules on the card and help wick heat into the metal frame. Now simply install the cold plate or water block onto the GPU.
If you’re using a new cooler that already has a thermal pad or thermal paste on it, you’re good. If you are indeed reusing one, clean the surface and reapply thermal paste. I recommend ArctiClean for removal of gunked-on thermal paste. One word of advice: When you torque down the cold plate, don’t get too crazy. That is an exposed GPU core, and cracking it or chipping it means you have destroyed your video card. Luckily, there is a metal shim around the perimeter that should reinforce the card against damage.
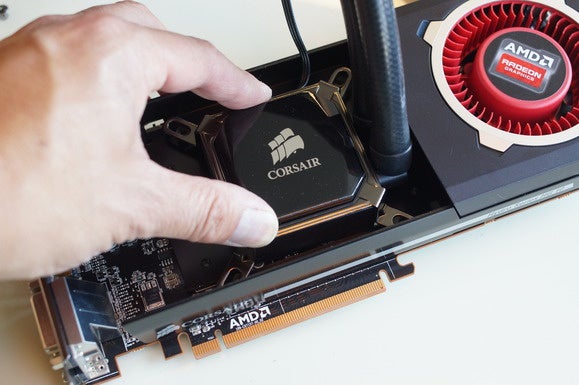
For this project, I decided to test out Corsair’s idea that you can just use your old cooler, so I went with an older H60 cooler, which is attached using the thumb screws that come with the HG10 A1 bracket. After you’ve installed the GPU, make sure you power up the pump and fan by plugging them into a nearby header connector on your motherboard. You may also want to go into your motherboard’s BIOS and increase the voltage to that power connector. Some motherboards won’t supply enough voltage to run the pump at the correct speed, which can cause problems.
 Gordon Mah Ung
The last step is to install the cold plate or water block.
How does it perform?
Once I had the card together, I threw it into a system to test. In this case, it was a Core i7-6700K Skylake rig with 16GB of DDR4/2666 and a Kingston HyperX Predator SSD running Windows 8.1.
I decided to run the card using a worst-case scenario, so I used the infamous Furmark stress test. GPU companies have described Furmark as a “power virus.” They don’t like it.
For comparison, I first ran the Radeon R9 290 with its stock cooler and FurMark set to 8x AA. With those settings, I saw the card quickly hit 94 degrees Celsius with its stock cooler. AMD took a lot of flack over the noise of the Radeon R9 290 and 290X cards when first released. I’m not sure if the drivers or the BIOS on this card reflects those complaints, but rather than let the card get insanely loud by cranking up the fan speed, the 290 card I had throttled performance instead. The card’s stock speed is 947MHz, but under full load, it slowly fell back to 916MHz. I could actually get the card running at its stock 947MHz clocks, but only with the fan set to far higher speeds.
The 290 and 290X fans, for the record, can get so loud and shrill, you won’t want to be in the same room with the system. I know from first-hand experience with a multi-GPU Bitcoin mining machine.
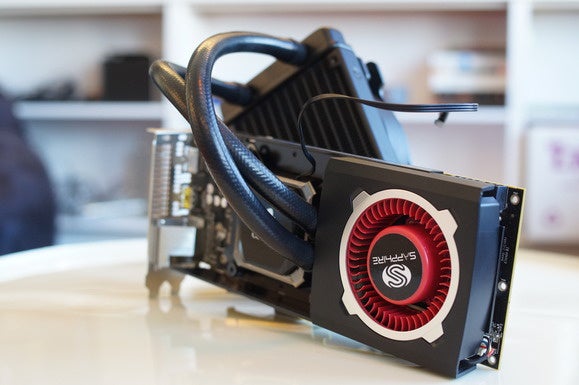
So how about the HG10 A1 and the H60? Pretty damned good. While I could easily hit 94 degrees Celsius and see the clock speeds start to throttle back with the air cooler, the liquid cooler held at 56 degrees Celsius under the same Furmark load. One thing I did experience was a black screen when I let the GPU control the fan speed under load. Because the card thinks it’s running a nice chilly 56 degrees all the time, it never increases the fan speed—which, I believe, was the cause of my crash. You can manually crank up the fan speeds using MSI’s Afterburner utility.
 Gordon Mah Ung
Water cooling can tame even the Radeon R9 290 card.
Conclusion
One issue I didn’t anticipate was just where that radiator would be mounted. The only choice for most will be on the bottom of the case or the case door. Trying to route it up over the GPU wasn’t feasible with the H60’s hose length. In a lot of cases, such a setup just won’t work. So plan accordingly, as it will be a limiting factor.
The performance may make it worth ditching the case, though. I saw significant reduction in heat and noise by going with liquid, and none of the throttling I saw on air cooling. For a 20-minute project with a $35 bracket (assuming I had an old liquid cooler), that’s not bad.


