 Image: IDG
Back in the days when mechanical hard drives with spinning platters were the norm, you could simply hand your old hard drive to a deserving relative or friend as an upgrade, get a thank you, and call it a day. It’s not so simple with today’s solid-state drives.
In many cases, used SSDs simply aren’t as fast as newer ones, though they’re all faster than the latest hard drives. The biggest issue in retasking or reselling an SSD for a prolonged period stems from an inconvenient characteristic of NAND flash memory: Previously written cells must be erased before they can be rewritten with new data. If the SSD is forced to reuse cells rather than use new ones while storing data, performance will plummet.
To avoid this problem with NAND flash memory, modern SSD controllers use a number of tricks, including building in extra capacity that users can’t touch—a technique known as over-provisioning. There’s also a command called TRIM that tells an SSD when blocks of memory are no longer needed and can be consolidated and erased.
Sounds good, right? But there’s a catch.
Better in theory than in practice
 Intel
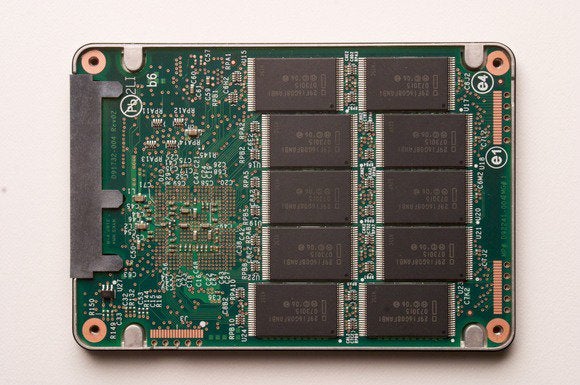
IntelNAND memory inside an Intel enterprise-class X-25E Extreme SATA SSD.
Not all garbage collection (as the erasing used cells and consolidating data in an SSD’s NAND is known) is created equal. It may not run constantly, and some older operating systems—notably Windows XP—don’t even support the TRIM command. As such, more “used” NAND cells may be left hanging around on your SSD than you’d suspect, according to nearly every vendor and data-recovery specialist I consulted
Windows 7 and 8 users really needn’t worry about all this. A modern SSD’s performance shouldn’t degrade noticeably for years if even then. But there are several scenarios where these idle cells can add up to a big hit on your SSD’s performance, such as prolonged use in a non-TRIM environment (like XP), after nearly filling the drive and erasing large amounts of data, or simply repartitioning and reformatting without taking an important step.
Yes, simply deleting files and repartitioning and formatting your drive won’t do the trick as it will with a hard drive. Those operations take place at levels above where true garbage collection occurs in an SSD. In fact, due to the total absence of utilities that force complete garbage collection, there’s only one way to return a heavily used SSD to pristine, like-new condition immediately—the ATA secure-erase command.
Secure erase to the rescue
Secure erase, a function built into every ATA-based drive (hard drives and SSDs) since 2001, erases everything on a drive and marks the cells as empty, restoring any modern SSD to factory-fresh default performance.
Once upon a time, you could invoke secure erase only via command-line utilities such as Linux’s HDparam or the DOS-based HDDerase, developed by the University of California San Diego (with funding from the NSA, incidentally). But now, many SSD and hard-drive vendors provide a free utility—such as OCZ’s ToolBox, Samsung’s Magician, or Seagate’s SeaTools—that provides a secure erase capability.
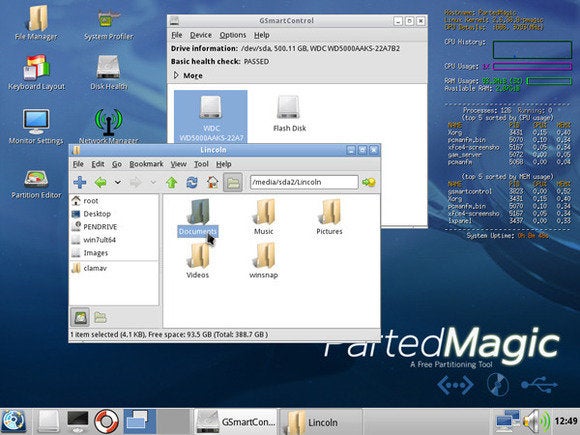
Note that while the command is standard, many vendor utilities work only with their company’s products. If your vendor doesn’t provide a secure-erase command, you can use the DriveErase utility found in the stellar Parted Magic software.
Also, the secure erase shouldn’t be thought of as routine maintenance for most users. If you’re using Windows 7 or 8, skip it unless you need to wipe the drive. If you’re using XP, only perform a secure erase if you really notice a drop in write performance. This is usually evidenced by “stalls” or when the computer seems to halt for short periods of time when you save a file.
Got all that? Good. Here’s how to restore your SSD to top performance, step by step.
How to restore your SSD to peak performance
First things first: If you have data on the SSD you’d like to retain, back it up. If you’re worried only about backing up files, simply drag and drop them onto a flash drive or external hard drive, or use your favorite backup program.

If you have a working operating system that you’d like to keep, however, use an imaging program such as Acronis True Image or R-Drive Image that copies everything. Do not use Windows System Recovery unless you’re restoring the data to the same drive. It won’t restore to a smaller drive and it sometimes hiccups even with a similar-size drive that has plenty of room.
Next, download the drive utility provided by your SSD vendor, or snag Parted Magic.
Before you get down to brass tacks, disconnect all other drives and boot from a flash drive to perform the erase procedure, to avoid accidentally overwriting the wrong drive. Parted Magic is a great option for this, since it works as a bootable flash drive. If disconnecting your other hard drives is too much hassle, make darn sure you’ve selected the correct drive to erase throughout this procedure. Secure erase is irrevocable.
Now run the secure-erase function. The exact method varies by program. PCWorld’s guide to securely erasing your hard drive explains how to activate secure erase in Parted Magic, which runs on a bootable flash drive. Some SSDs implement the enhanced version of secure erase by default—which also deletes the drive’s housekeeping data—but if an enhanced erase option is available, you might want to use it. Definitely use it if you’ve been doing work for the CIA.

Parted Magic contains all the tools you need to restore an SSD to top performance.
The secure-erase process should take just a few minutes on a modern SSD. (Traditional hard drives can take hours, by comparison.)
Once the process is done, repartition and format the drive if you intend to copy data back to it. Parted Magic handily provides a full partition editor for this purpose, but you can use Windows’ own Drive Management utility (Control Panel > System and Security > Administrative Tools > Create and format hard disk partitions) to do the same task. Most commonly, you’ll want to use the full capacity of the SSD in a single partition and format it as NTFS.
Once that’s done, you’re good to go. Dump any data you may have saved back onto the drive and bask in the super-speeds of your good-as-new SSD. Check out PCWorld’s guide to prolonging the life of your SSD to keep your drive humming along for years to come.
Update: The original version of the article implied that performing the secure erase function regularly could increase the performance of modern SSDs. The article has been updated to clarify the specific situations in which performing the secure erase function is beneficial.


